https://docs.directadmin.com/oth ... db-mysql/redis.html
Redis (PRO PACK)This is a ** PRO-PACK FEATURE ** Redis functions as a simple database/cache for Users. This can be useful for offloading some of the stress from your database into memory, if you have the memory available to support it. To install redis:
- cd /usr/local/directadmin/custombuild
- ./build set redis yes
- ./build redis
#Enabling for usersAll Reseller/User packages and reseller.conf/user.conf files will have redis=OFF by default. The Admin account reseller.conf will have redis=ON by default. All accounts that need redis must have it enabled like so: - Enable redis in the packages and re-save as needed
- Enable redis in the accounts and save as needed.
#CMD_REDIS JSON#Checking the status for a userTo check the current status for the current User, use a GET request with no options. The return should look similar to this: - {
- "enabled": "0",
- "global": "1"
- }
- "enabled" refers to redis=ON in the user.conf
- "global" is the service check to ensure it's installed on the system
#Enabling Redis for a userSubmit a POST request with the following:
#Disabling Redis for a userSubmit a POST request with the following:
#API usageCMD_API_REDIS does exist and will always be use JSON mode for output. #Relative Skin changesThe following files were modified: - /usr/local/directadmin/data/skins/enhanced/admin/create_customized_reseller.html
- /usr/local/directadmin/data/skins/enhanced/admin/modify_reseller.html
- /usr/local/directadmin/data/skins/enhanced/admin/show_reseller_package.html
- /usr/local/directadmin/data/skins/enhanced/lang/en/lf_standard.html
- /usr/local/directadmin/data/skins/enhanced/reseller/create_customized_user.html
- /usr/local/directadmin/data/skins/enhanced/reseller/modify_user.html
- /usr/local/directadmin/data/skins/enhanced/reseller/show_user_package.html
to support the relative global tokens including: - <li>RESELLERREDIS=ON</li><li>USERREDIS=ON</li><li>HAVE_REDIS=ON (which is enabled in license and installed on system)</li>
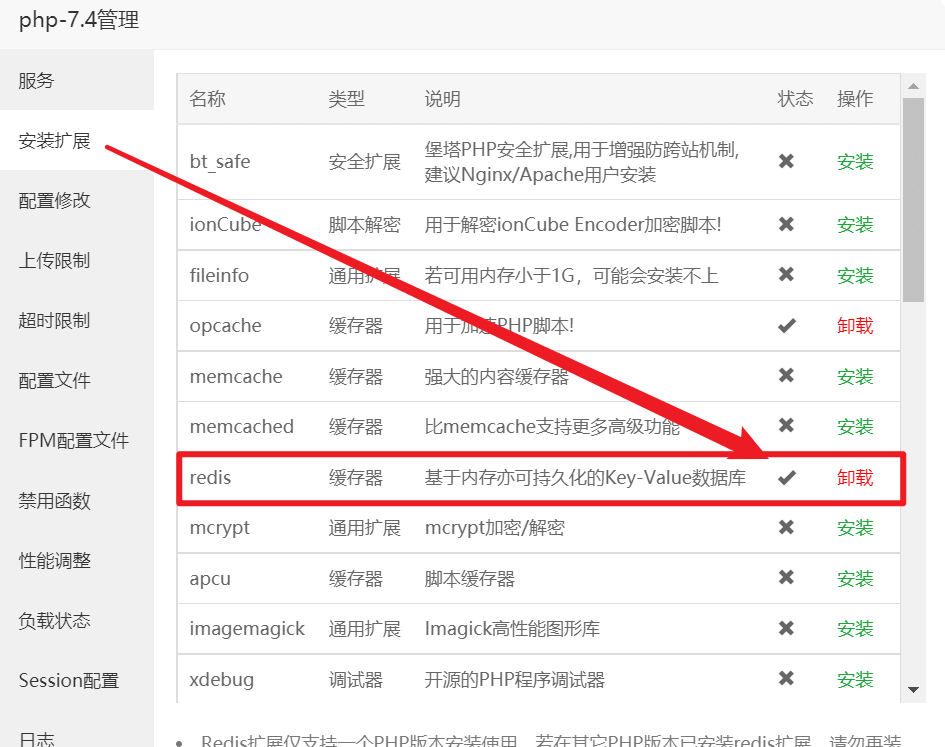
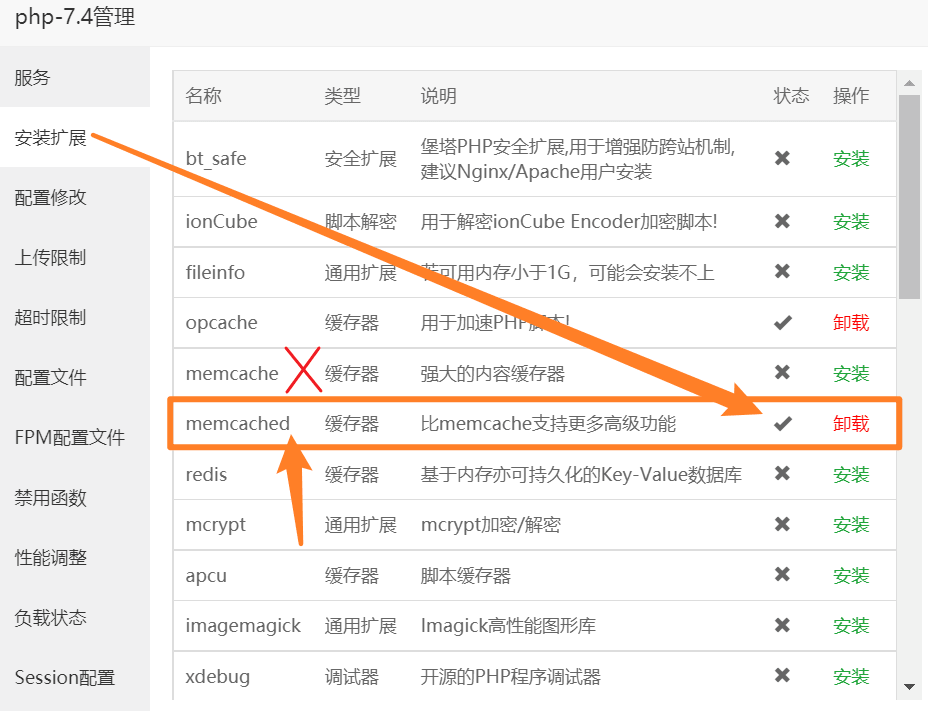
POST values for packages/reseller/user include redis=ON or redis=OFF, and omission altogether implies OFF. #How to Use Redis With WordPress- Install Redis and php_redis extension:
- <font color="rgb(44, 62, 80)"><font face="-apple-system, BlinkMacSystemFont, " "=""><font style="font-size: 16px">cd /usr/local/directadmin/custombuild</font></font></font>
- <div><font color="rgb(44, 62, 80)"><font face="-apple-system, BlinkMacSystemFont, " "=""><font style="font-size: 16px">./build set redis ye</font></font></font><span style="font-size: 16px; font-family: -apple-system, BlinkMacSystemFont, " ";="" color:="" rgb(44,="" 62,="" 80);"="">s</span>
- <span style="font-size: 16px; font-family: -apple-system, BlinkMacSystemFont, " ";="" color:="" rgb(44,="" 62,="" 80);"="">./build redis</span>
- <span style="font-size: 16px; font-family: -apple-system, BlinkMacSystemFont, " ";="" color:="" rgb(44,="" 62,="" 80);"="">./build php_redis</span></div>
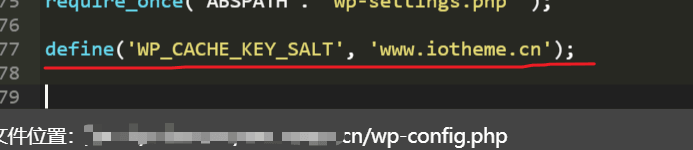
to /home/<user>/domains/<domain>/public_html/wp-config.php BEFORE the last line which includes wp-settings.php. **Make sure to replace <user> ** with the DirectAdmin user you're trying to configure. Note that the path defined by WP_REDIS_PATH should be the path mentioned in step 2.
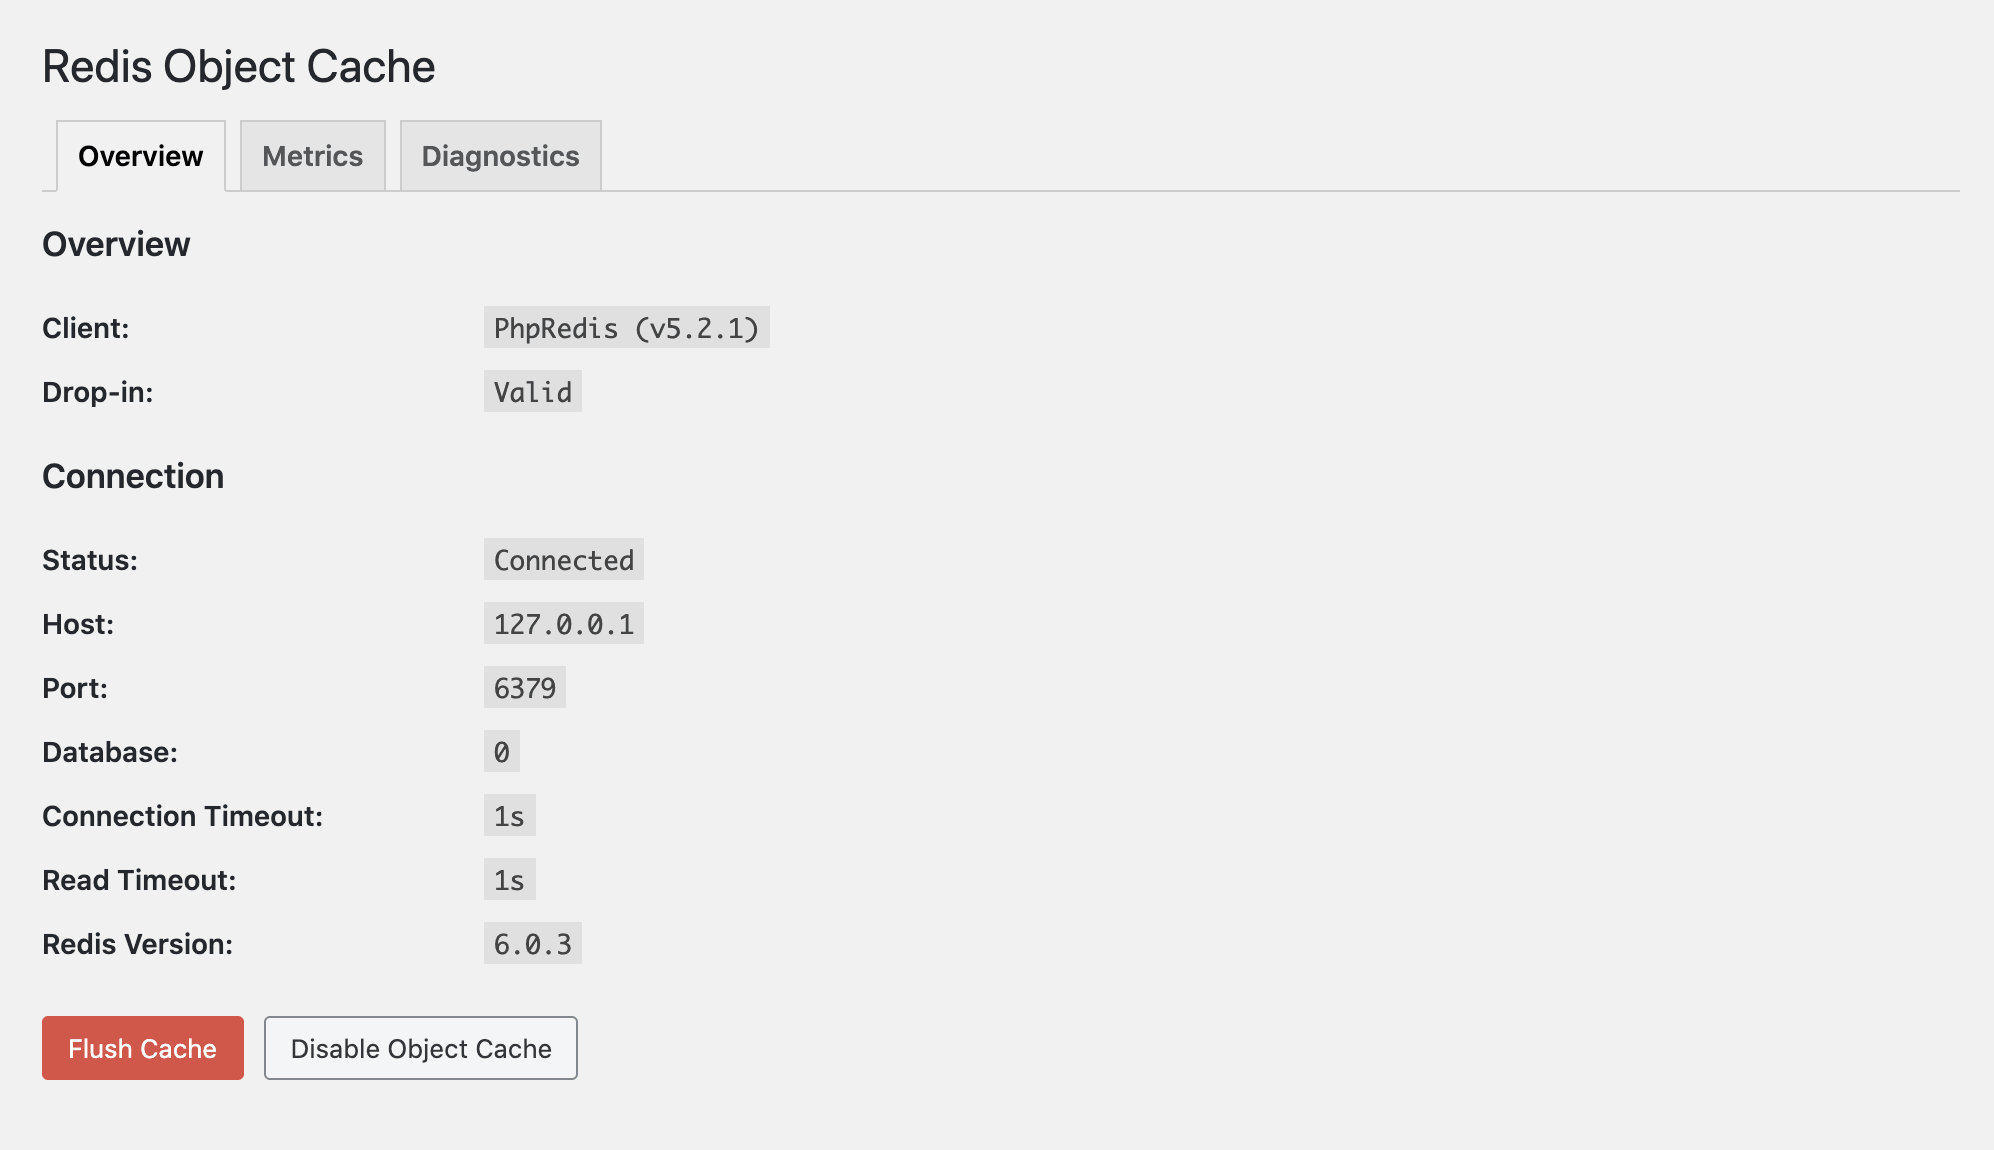
After refreshing the wordpress admin page, you'll notice that the connection status changed to "Connected".
|  |Archiver|手机版|小黑屋|吹友吧
( 京ICP备05078561号 )
|Archiver|手机版|小黑屋|吹友吧
( 京ICP备05078561号 )


 狗仔卡
狗仔卡 发表于 2024-4-22 14:38
 3.询问您的主机商
 提升卡
提升卡 变色卡
变色卡 显身卡
显身卡